Donation
Our donation example enables to forward money to an account while keeping track of it. It is one of the simplest examples on making a contract receive and send money, and the perfect gateway to enter the world of decentralized finance.
Starting the Donation Example
You have two options to start the Donation Example. The first and recommended is to use the app through Gitpod, which will open a web-based interactive environment. The second option is to clone the repository locally, for which you will need to install all the Prerequisites.
- 🌐 JavaScript
- 🦀 Rust
- 🚀 AssemblyScript
| Gitpod | Clone locally |
|---|---|
 | 🌐 https://github.com/near-examples/donation-js.git |
| Gitpod | Clone locally |
|---|---|
| 🦀 https://github.com/near-examples/donation-rust.git |
| Gitpod | Clone locally |
|---|---|
| 🚀 https://github.com/near-examples/docs-examples -> donation-as |
If you choose Gitpod a new browser window will open automatically with the code. The project will compile and eventually the frontend will open in a new window/tab (make sure the pop-up window is not blocked).
If you are running the app locally, enter the directory where you cloned it and use yarn to install dependencies, and yarn start to start it.
cd donation
yarn
yarn deploy
yarn start
Your contract will then be compiled and deployed to an account in the testnet network. When done, a browser window should open.
Interacting With the dApp
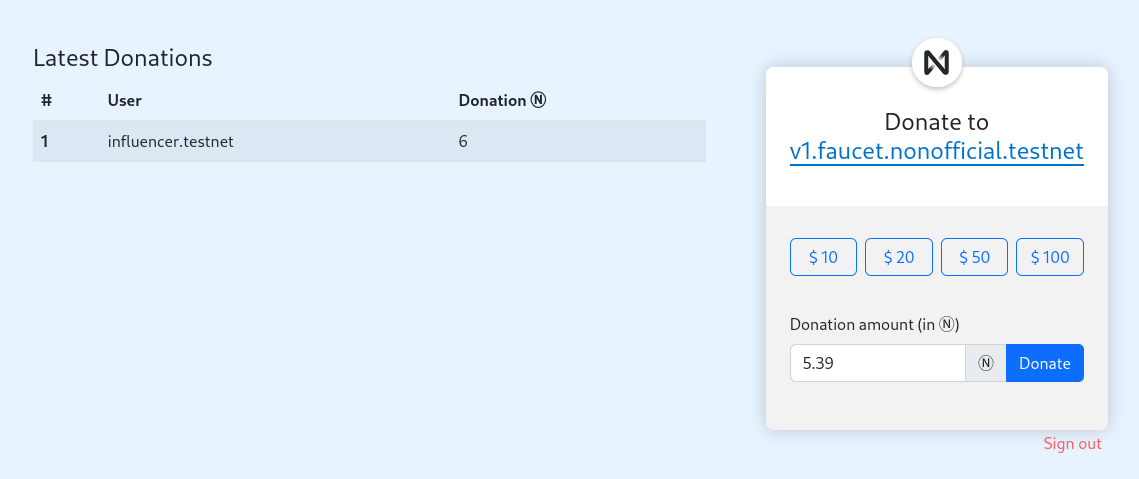
Go ahead and login with your NEAR account. If you don't have one, you will be able to create one in the moment. Once logged in, input the amount of NEAR you want to donate and press the donate button. You will be redirected to the NEAR Wallet to confirm the transaction. After confirming it, the donation will be listed in the "Latest Donations".
Frontend of the Donation App
Structure of a dApp
Now that you understand what the dApp does, let us take a closer look to its structure:
- The frontend code lives in the
/frontendfolder. - The smart contract code is in the
/contractfolder.
Contract
The contract exposes methods to donate money (donate), and methods to retrieve the recorded donations (e.g. get_donation_by_number).
- 🌐 JavaScript
- 🦀 Rust
- 🚀 AssemblyScript
loading...
loading...
loading...
Frontend
The frontend is composed by a single HTML file (/index.html). This file defines the components displayed in the screen.
The website's logic lives in /assets/js/index.js, which communicates with the contract through /assets/js/near/utils.js.
An interesting aspect of the donation example is that it showcases how to retrieve a result after being redirected to the NEAR wallet to accept a transaction.
- 🌐 JavaScript
- index.js
- near-interface.js
- near-wallet.js
loading...
loading...
loading...
Testing
When writing smart contracts it is very important to test all methods exhaustively. In this
project you have two types of tests: unit and integration. Before digging in them,
go ahead and perform the tests present in the dApp through the command yarn test.
Unit test
Unit tests check individual functions in the smart contract. They are written in the same language as the smart contract is.
- 🦀 Rust
- 🚀 AssemblyScript
loading...
loading...
Integration test
Integration tests are generally written in javascript. They automatically deploy a new
contract and execute methods on it. In this way, integration tests simulate interactions
from users in a realistic scenario. You will find the integration tests
in tests/integration-tests.
- 🌐 JavaScript
loading...
Moving Forward
A nice way to learn is by trying to expand a contract. Modify the donation example so it accumulates the money in the contract
instead of sending it immediately. Then, make a method that only the beneficiary can call to retrieve the money.